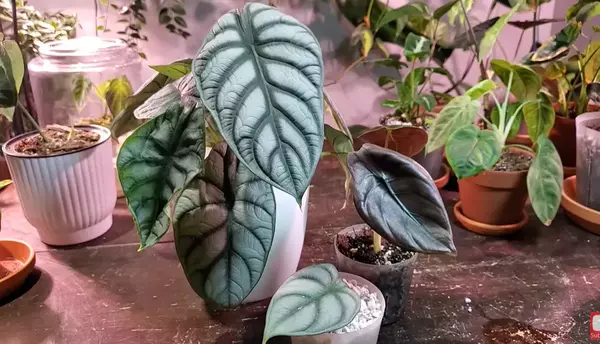
Alocasia is a broad genus of houseplants, covering almost 70 versatile species and around a dozen hybrids. Alocasias are popular because of their prominent foliage. The leaves resemble the ears of an elephant and consist of the most prominent multi-colored vein structure. The colored veins enhance the appearance of the Alocasia to a great extent. If you are an Alocasia lover you would love to multiply this beauty . Therefore , we are sharing the successful Alocasia propagation methods and how to propagate Alocasia.

Some of the Alocasia varieties are rare and quite expensive; therefore, the propagation of Alocasia is also much considerable for all those who adopt this household plant to enhance the appearance of their gardens. Here is the comprehensive guide to provide more detail about Alocasia Propagation and how to propagate Alocasia successfully.
Allied Species: Alocasia Sarian, Alocasia Silver Dragon, Alocasia Stingray, Alocasia Pink Dragon, Alocasia Lauterbachiana, Alocasia Dark Star, Alocasia Portora, Alocasia Cucullata, Alocasia Cuprea Care, Alocasia Maharani, Alocasia Regal Shields
Related Products:
What is Propagation?
Propagation is a process in which the existing plant portions give rise to new plants and increase their population within the same garden. Propagation is the easiest and most affordable way of increasing the number of plants in your garden.

Some plant categories produce a new stem and shoots, whereas others grow the bulb portion in roots. The bulb in the roots is the most effective and successful method of the Alocasia Propagation. Apart from making new plants, various other benefits are bound to the propagation process. Such as;
- It saves your time and effort
- Cost-effective, you do not have to buy a new Alocasia plant for your garden.
- You will be able to get a baby plant which is an exact copy of the mother.
Various propagative procedures are available for Alocasia. You can propagate the Alocasia plants by dividing the rhizomes., offsets, or through bulbs.

Right Time of Propagation
The best span for propagating Alocasia is spring and late spring since this is Alocasia’s natural developing and growing time.
We do not recommend performing a propagative procedure in the mid of the summer. The development period will coincide with the upcoming winter season if you perform propagation in mid or late summer. Alocasias become dormant in winter, and the plant will be stressed due to new developments. It will not be able to recover as the dormancy period arrives.
As explained, in the colder time of year, Alocasia goes lethargic, meaning it ceases to grow. Therefore, if you attempt to propagate it during the colder time of year, you will lose the plant since it can’t develop during this period.
With the headway of spring, Alocasias again begin to develop appropriately. Therefore, spring is the perfect period to propagate plants from your full-grown Alocasia. The atmosphere is charming and gentle, and the Alocasia develops quickly during this time.
Consequently, the plant finds it simple to deal with the proliferation and shows the development from the propagative parts of existing plants.

How to propagate Alocasia plants?
There are several ways you can propagate a healthy Alocasia plant. These include propagation by offset, division of roots, and through bulbils or corms.
However, in case of any propagation, please ensure to have the following items available with you before starting propagation.
- Sharp and sterilized knife
- Fresh potting soil
- Water for moistening the soil
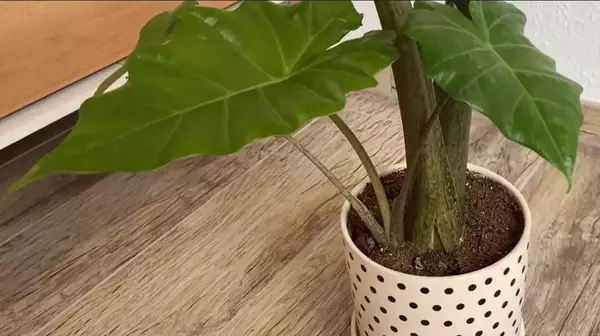
- A fully developed Alocasia
- A good quality disinfectant
- A plastic to cover new baby plants

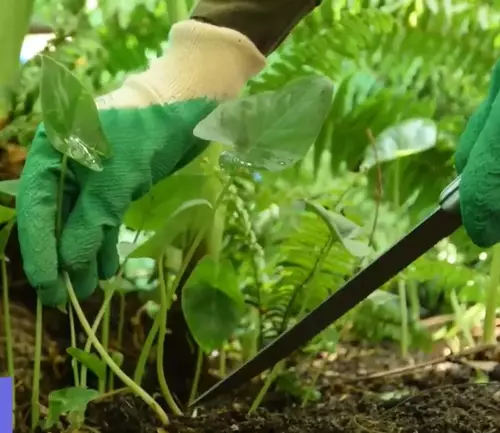
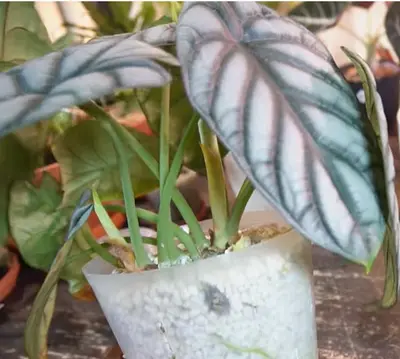
Alocasia Propagation by Offsets
This method is a very effective, simplest, and most successful way of propagating Aloacias. Most of the time, you will notice your fully developed Alocasia is growing a new baby plant in the same pot. It is simple to separate this baby plant from the mother and convert it into a new Alocasia plant by following the below steps.
- Wet the soil one or two days before planning to propagate the plant. Moistening the soil will help safely remove the Alocasia from the pot.
- Gently take out the mother plant from the pot.
- Remove the soil around the already growing offset baby plant.
- Use a sterilized knife to separate the roots of the baby shoot from the mother plant.
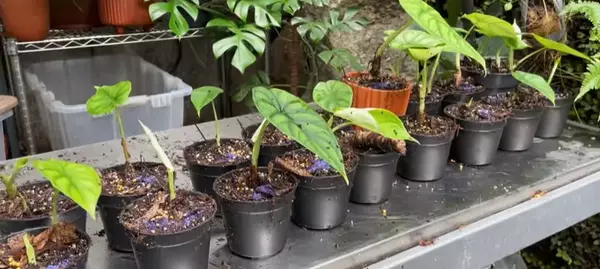
- Plant the separated baby Alocasia in moist soil and cover it with plastic to retain the humidity.
- Once you notice a growth on baby Alocasia, remove the plastic and place it with other Alocasias.
Knowing moist and wet soil is essential to keep the Dragon Alocasia plant thriving. The moisture level is ideal when the base portion of the substrate is marginally wet. It must not be overly wet or dry. On the whole discussion level, accurate watering schedules rely upon various factors. These factors include temperature, a measure of daylight, the season, and the soil type.

Propagation through Root Clumps
The Alocasia roots have a structure formed of clumps that can be easily separated from each other.
Before beginning the propagation process, deciding whether you want to pursue the propagation process in soil or water is essential because both have varying preventions or requirements to grow new plants.
The propagation by division method is just a few-minute procedure. You require nutrient-rich soil with material supply, as mentioned above.
1. Can you Water Propagate Alocasia cutting?
Yes, we can water propagate Alocasia cutting for many Alocasia species. There are various easy-to-follow steps for water propagation of Alocasia;
Wait for at least a week, and it will start developing the new plants. After that, safely transfer to the moist soil of the pot or garden for further development.
2. Propagation in Soil
It is better to find an excellent outdoor soil area for soil propagation. It is not preferable to perform indoors because it is a messy process. Once you get the suitable land and nutrient-rich balanced soil portion, sterilize your shear knife. So that it won’t transfer any disease or infection.
Splitting or Dividing Tuber

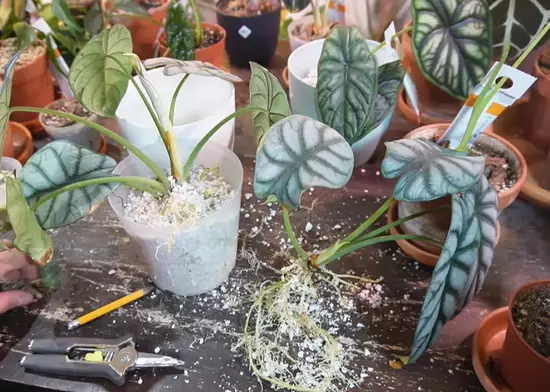
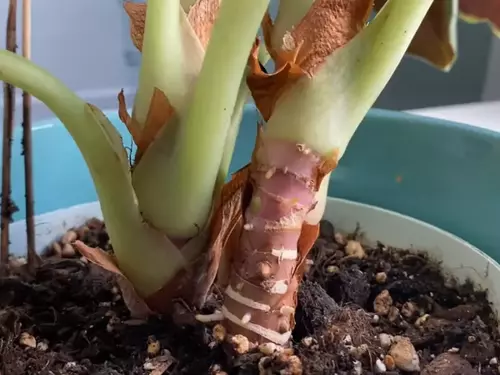
Propagation through Corms or Bulbs
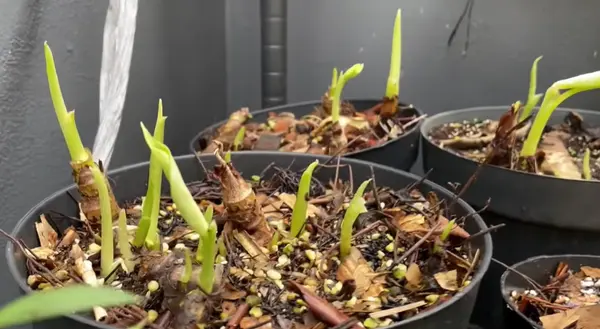
Alocasia plants develop corms or bulbs that can be used to produce new Alocasia plants. You can dig around the potting soil of your full-grown Alocasia to find the corms. I found propagation through corms the easiest and most successful propagating method.
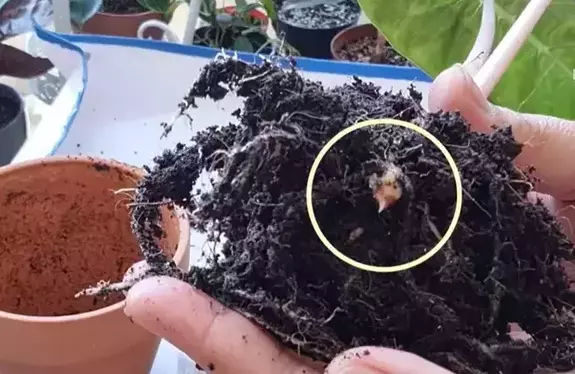
However, you will be most successful in finding the bulbs during repotting. Once the roots are out of the pot, shake away the soil and separate the bulbs or corms from the root ball.
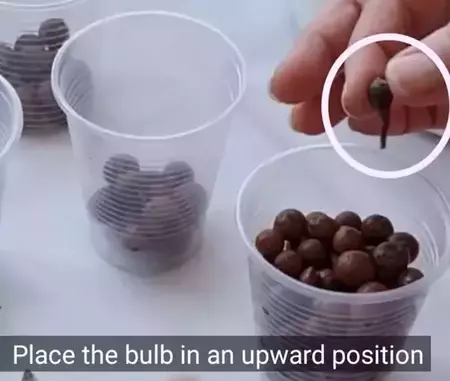
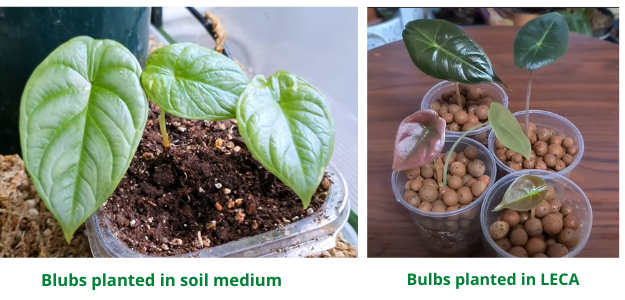
You can plant these bulbs in a moist soil medium or LECA and cover them to provide the required humidity. A new Alocasia plant will emerge from the bulb in a few weeks.

How to Divide Alocasia?
Another effective and successful method of Alocasia propagation is via division due to its clumping or rhizomatous growth. (stem that grows underground. ) This stem grows horizontally in the ground, has nodes or growth points, and can grow new leaves and stems. This method comes in handy, especially if your Alocasia gets bushy and there is no space left in the pot for further growth.
By dividing Alocasia, you can get two or three more plants. Just follow the simple steps;
The Final Statement
Alocasias are wonderfully tropical plants chosen by plant lovers to enhance the appearance of their homes. Apart from its beautification, it might be an expensive option to buy every time. So propagation will help you in this regard.
Following the above technique and procedural tips allows you to get various Alocasia plants without spending additional cash.
FAQs
Can you propagate Alocasia from cutting?
Yes, you can propagate Alocasia from cutting. For stem cutting, you need to inspect your plant. You can take the cutting of the stem if it has growth points or nodes. Use a sharp knife or scissors to cut the top cutting. Then plant the separate cutting pot in potting medium or sphagnum moss. Within a few weeks, that cutting will grow roots.
If you are not confident, you can try air layering first. Take some sphagnum and wrap it around the stem where you suspect nodes. Then cover the sphagnum with plastic wrap. Please wait for a week or two until it grows roots. Once you notice root growth, remove the plastic and take a sharp knife to cut the stem with newly developed roots. Now you can plant that cutting in a separate pot, and it will survive as it already has good roots.
How do you multiply Alocasia?
To multiply Alocasia, gently take out the plant from its container. Brush away the potting soil covering the root clumps. Now search for blubs in the roots. These blubs or corms come off from the roots easily. Moreover, you can also separate the tubers of the mother plant in the soil. Later, you can plant the corms and tubers in potting mix. Each of them will grow into ne plant.
How long does it take to propagate Alocasia?
Well, it depends on the method of propagation and Alocasia variety. If you care propagating through corms or rhizomes, it takes 3 to 4 weeks to sprout, and within 1 to 4 months, they will shoot leaves.
In the case of air layering, it takes 1 to 2 weeks to grow roots. If you are water propagating, it might take a couple of months to establish roots.
How do you make Alocasia grow more leaves?
You can make Alocasia grow more leaves by placing them in bright indirect light. Feeding the plant with nitrogen-based fertilizer also boost foliage growth. If you want your Alocasia to look bushy, you can search for corms in the roots and propagate them. Later you can add the newly grown baby plant with the mother plant to make it bushy.